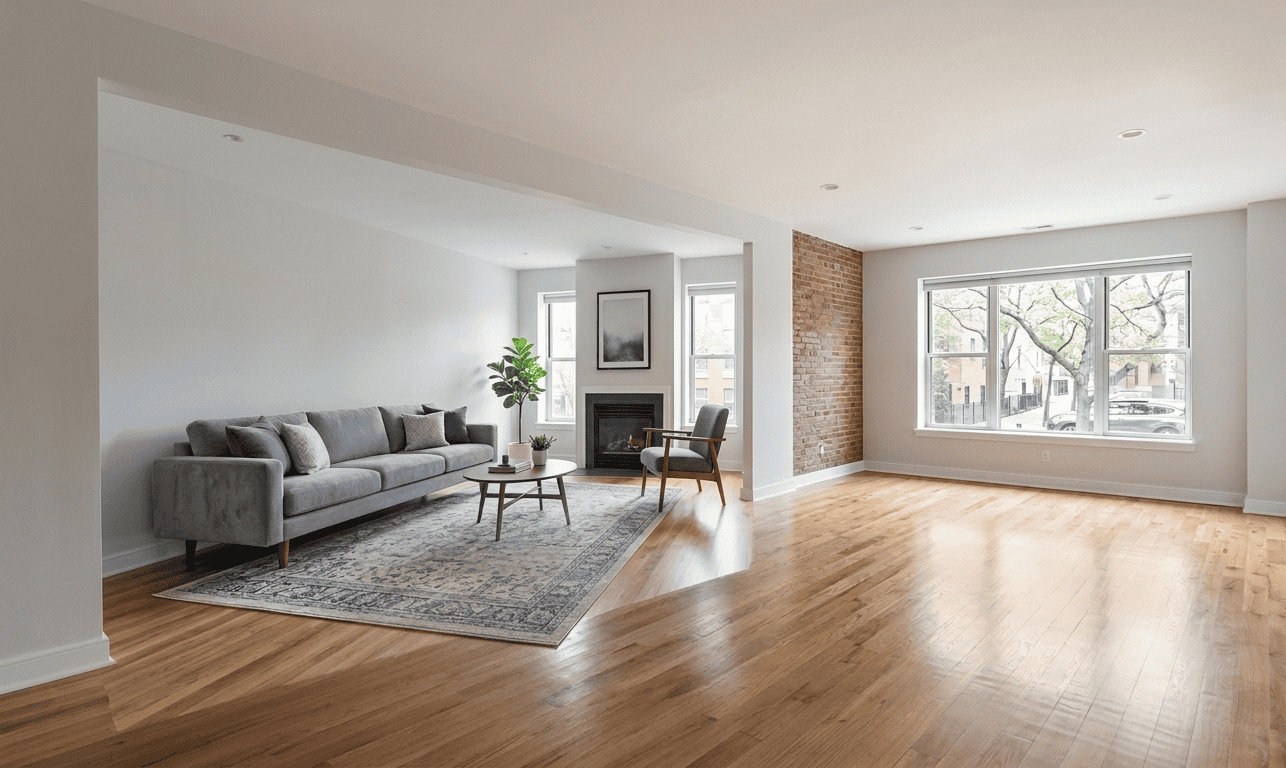
Modern rendering creates realistic interiors that look like photographs yet remain fully editable digital scenes. For real estate professionals, designers, and 3D artists this capability has reduced the need for costly on site photo shoots and allowed scenes to be iterated quickly. The result is a visual language that speaks to buyers and clients in a way static photos sometimes cannot match.
This article walks through why modern rendering produces believable rooms, which techniques matter most, and practical steps to get reliable results for listings or design presentations. Read on for concrete tips, software and hardware pointers, and examples that you can apply on the next project.
Modern Rendering Creates Realistic Interiors and Why That Matters
When we say modern rendering creates realistic interiors we mean render engines now simulate how light interacts with surfaces in ways that align closely with what a camera would record. This is important for selling a property or showing a design concept because buyers respond to clarity about space scale finishes and light. A convincing render reduces doubt and speeds decisions.
Realism in interiors comes from a combination of accurate material response, physically correct lighting, and believable composition. Each element must read correctly on its own and in combination. If wood grain looks accurate but shadows are soft in the wrong places the scene will register as fake. Attention to small details like subtle surface imperfections and consistent color temperature often have outsize impact.
How Material Models Make Rendered Surfaces Read as Real
Material models are at the core of realistic interiors. Instead of flat colors modern workflows use layered materials that define base color roughness reflectivity and subsurface scattering. Those layers mimic real world behavior so a polished stone countertop reflects highlights sharply while a painted wall scatters light softly.
Practical tips for materials
- Use physically based parameters rather than tweaking color only. Parameters such as roughness and index of refraction matter.
- Use texture maps for imperfections. Tiny scratches dust and subtle tilt variations in normals sell realism more than ultra high resolution color alone.
- Match reference photographs. If you have a photo of the material compare it against the render and adjust the maps until the response is similar.
Lighting Techniques That Make Computer Interiors Believable
Lighting is the single largest factor in how believable a room looks. Modern renderers calculate global light transport so indirect light fills rooms naturally and cast shadows behave predictably. Understanding how each light source contributes keeps scenes from looking overlit or unnaturally flat.
Global Illumination Basics
Global illumination refers to light that bounces off surfaces and lights other surfaces. In interiors this creates soft secondary illumination that defines the mood of a room. Simpler direct only lighting misses this interaction which makes scenes feel synthetic. Most production renderers offer one or more global illumination solutions so test them and watch render times against quality.
Balancing Natural and Artificial Light
Natural window light creates a directional cue that viewers read quickly. Combine that with warmer indoor lights and keep the balance consistent. A common workflow is to set an outdoor sun or sky system first then add interior luminaries to fill shadows and highlight focal points. Pay attention to color temperature to avoid mismatched warm and cool tones unless that is a deliberate stylistic choice.
Workflow Tips for Faster Render Turnaround
Streamlined workflows get you to publishable images without extra hours in front of the screen. The key is separating scene construction from final shading and lighting passes so you can preview composition and camera placement quickly and save heavy computations for final frames.
Scene Preparation
Start by blocking out proportions and camera angles in low fidelity. Use proxy geometry for furniture and background elements. This keeps navigation smooth and allows you to set the scene mood without waiting for every texture to load. After the layout is locked swap in higher quality assets for final renders.
Render Settings to Watch
Pay attention to sampling settings noise thresholds and denoising options. Noise can hide detail and make a scene feel unfinished but over sampling wastes time. Use adaptive sampling and region rendering to focus compute on the parts of the frame that need it most. A short test render at production settings helps reveal issues early.
Choosing Software and Hardware for High Fidelity Interior Images
There are many render engines and tools that make modern rendering creates realistic interiors. Some options are tailored toward speed others toward maximum photoreal output. When evaluating tools consider the native material system lighting features and ecosystem of assets and plugins available.
For real estate presentations there are also simpler virtual staging solutions that allow a fast turnaround without extensive 3D modeling. Those tools often rely on machine learning to position furniture and reimagine empty rooms. If you are curious about DIY options that work well for agents and small studios check resources that compare virtual staging platforms and user workflows with photorealistic results usually.
Hardware choices matter too. A modern multi core CPU accelerates scene preparation and some renderers scale well across cores. Many artists pair a strong GPU with large VRAM for real time viewport performance and GPU based renderers. If budget is limited prioritize GPU VRAM first for large interior scenes.
Post Production and Color Management for Consistent Results
Post production is not cheating it is part of the visual pipeline. Final color correction tone mapping and subtle sharpening can bring a render into alignment with reference photography. Keep edits non destructive and retain the render passes for flexibility. Exposure adjustment and selective contrast control often do more for believability than heavy artistic filters.
Color management prevents surprises when images move between applications and screens. Work in a linear color space during rendering then convert to the target output space for final delivery. This keeps highlight roll off and shadow detail predictable across devices and print.
Common Pitfalls and How to Avoid Them
Even experienced users fall into the same traps when creating interiors. Below are recurring issues and practical fixes that save time and improve final quality.
- Flat materials that lack micro detail. Fix by adding subtle normal maps and edge wear where appropriate.
- Incorrect scale for furniture and decor. Always measure or use standard furniture sizes to avoid awkward proportions that reveal a render as fake.
- Noise in shadow regions. Use targeted sampling and softer light sources rather than cranking overall samples which increases render time.
- Mismatched color temperatures. Use a consistent approach to light sources and check white balance against a neutral object in the scene.
Finally test your images on multiple screens and in print if the images will be used offline. What looks good on one monitor may be too dark or warm on another. Small adjustments based on verification go a long way.
Conclusion
Modern rendering creates realistic interiors by combining accurate material models physically informed lighting and pragmatic workflows. That combination lets real estate professionals and designers present spaces that read as true to life while still allowing rapid changes and customizations. Focus on layered materials correct light setup and a clean pipeline from scene preparation to post production and you will see consistent improvements in believability.
If you are experimenting with virtual staging or looking to speed up listing photo work begin by testing a few render engines and staging tools on the same scene. Compare final images and note where time was spent so you can repeat the most effective steps. If you need to learn faster pick one technique at a time such as mastering roughness maps or camera exposure and practice it across several rooms. That focused effort yields visible gains without overwhelming your schedule.
Ready to improve your interiors now Try creating a small test scene three different ways and compare how each approach handles light material and composition. Keep a short checklist for common pitfalls and run it before each render. If you enjoyed these tips share the article with a colleague or sign up for a short tutorial series to get hands on examples. Small changes in material setup and lighting make a big difference and the next render can be the one that changes how clients perceive a space.

RELATED ARTICLES



Ad

Advertisement

Commercial